Docker for Beginners : Learn to Dockerize your Node Application
Lets understand Docker in the Simplest way by dockerizing a node application


Why Docker?
Lets take a real world scenario, Suppose you developed a brilliant web application and you want to share it with your friend. So, you share the code with your friend. But, when your friend tries to run that in his machine it doesn't work in his machine, It is giving errors etc. Now, here comes into picture the famous statement, "It works on my machine! :)". So, in our example, The reason behind the errors could be the version of dependencies that are required to run the project or his operating system configurations or may be something else.

Similar things happen when, a developer builds a project and pushes the code to production servers, due to some uncertain things like OS configurations, dependencies etc. the project either crashes or runs with low performance than it was running on the developer machine. To solve this problem, Docker is here....!!!!!
What is Docker?
In simple words, Docker is an open source platform for developing, shipping and running applications. Basically, Docker builds a "docker-image" of the application and runs it inside objects called "Containers" which are standardized and isolated. lets understand this in detail
- Dockerfile
- Docker Image
- Container
Dockerfile
It is a document which contains all the commands in order to build an image. These are the commands that a user could call in the terminal to build the image. Docker automatically builds an image with the help of instructions in the dockerfile
//format of dockerfile
INSTRUCTION arguments
Docker Image
Docker image is basically a set of instructions to create a container. It is a immutable file with an executable code which when executed create a container. we can store the docker images locally or in the docker hub(remote). Docker image specifies the overall configuration of the container. It is a snapshot of the current environment.
Container
A container is the place where our application is running. It is a package of all the application code alongwith the required dependencies. This enables us to run the applications reliably in any environment. Containers isolate the applications from the environment which makes them run uniformly regardless the infrastructure or the differences in the staging and development.
Overall flow
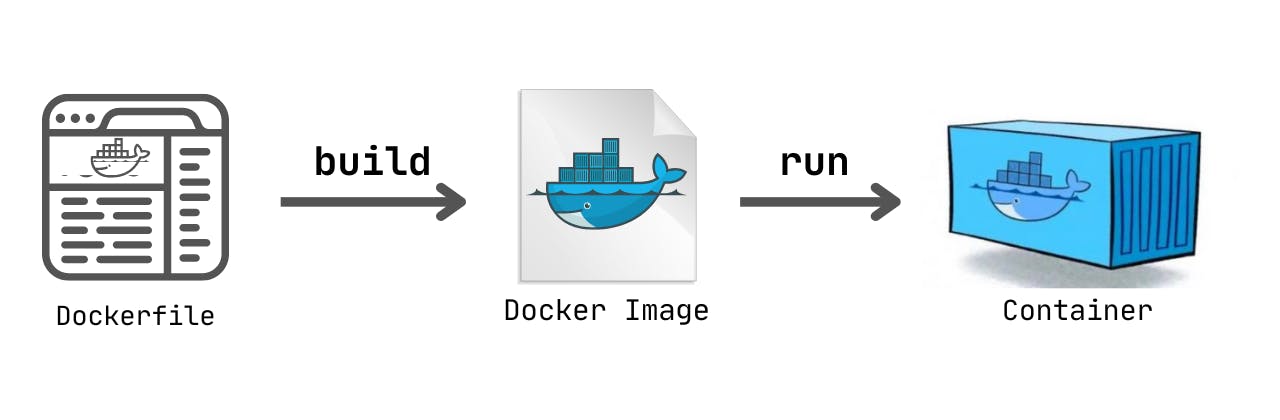
Lets build a basic node app and dockerize it.

Step 1.
Install docker desktop according to your operating system. It is available for Windows, Mac and Linux. Link to install : docker.com
Step 2.
After successfully installing docker desktop, we will create a basic node application. It will be a simple express server which greets hello world.
- Go to project directory and run "npm init" to create a project.
npm init - install required dependencies
- we will require express and nodemon (to restart the server after file changes)
npm install express nodemon
- we will require express and nodemon (to restart the server after file changes)
- Create a basic express server boilerplate
const express = require("express");
const app = express();
const port = 5000;

app.get("/",(req,res) => {
    res.send("Hello World !!!")
})

app.listen(port,() => {
    console.log(`Server started running on PORT ${port}`);
})
Now, Before running this add one script in package.json so that we can use nodemon to restart the server.
//inside package.json, in scripts add "start" script as shown below
 "scripts": {
    "test": "echo \"Error: no test specified\" && exit 1",
    "start":"nodemon server.js"
  },
- Now lets run the server locally by typing the following command in the terminal
npm start
Step 3.
Now, as we have set up our application, lets dockerize it!
Create Dockerfile
i.
- Inside dockerfile, firstly we have to add a base image so that docker can inherit other images from the base image
- As our application is a node app, we will add the official node.js image that already has all the tools and packages required to run a node.js application
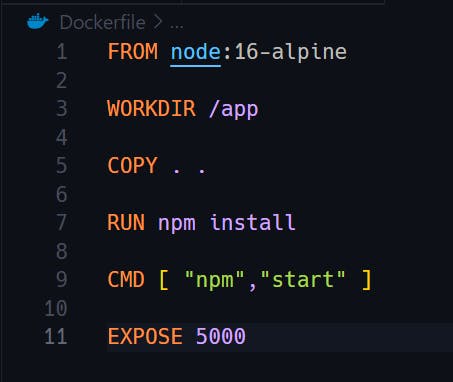
FROM node:16-alpine

// here 16 is node version and alpine is a linux dist. which takes less size
ii. Work Directory
- Before moving ahead, we have to setup a working directory which will tell docker to use it as a default path while executing rest of the commands
 WORKDIR /app

// here, /app will be used as a default path by docker
iii. Copy files to the image
- Now, we will copy all the project files to the image
- default syntax
COPY <source> <destination> - current destination directory is set to /app
COPY . .

//here . represents current directory
iv. Now, we have to tell docker to install required dependencies before running the application
RUN npm install
v. Lastly, as all things are set, we have to tell docker to run a command in order to run our image inside the container.
- It will be done using CMD command
CMD [ "npm","start" ]
vi. Specify on which port the docker container will listen
EXPOSE 5000
We have copied all the files, but we should not include node_modules in it because it is very heavy file. In order to achieve this,
- Create a new file with name ".dockerignore"
- Inside it add below line of code
node_modules/
Port Mapping
To access our application which is inside the container with the help of port number, we have to do port mapping of container port and the docker host.
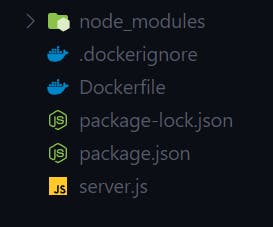
Folder Structure
Your Folder structure should look like this
Docker file
Your Dockerfile should look like this
Build Docker image
Cool! Now lets build the docker image
- Inside the terminal, in current directory run the following command
- . is current directory
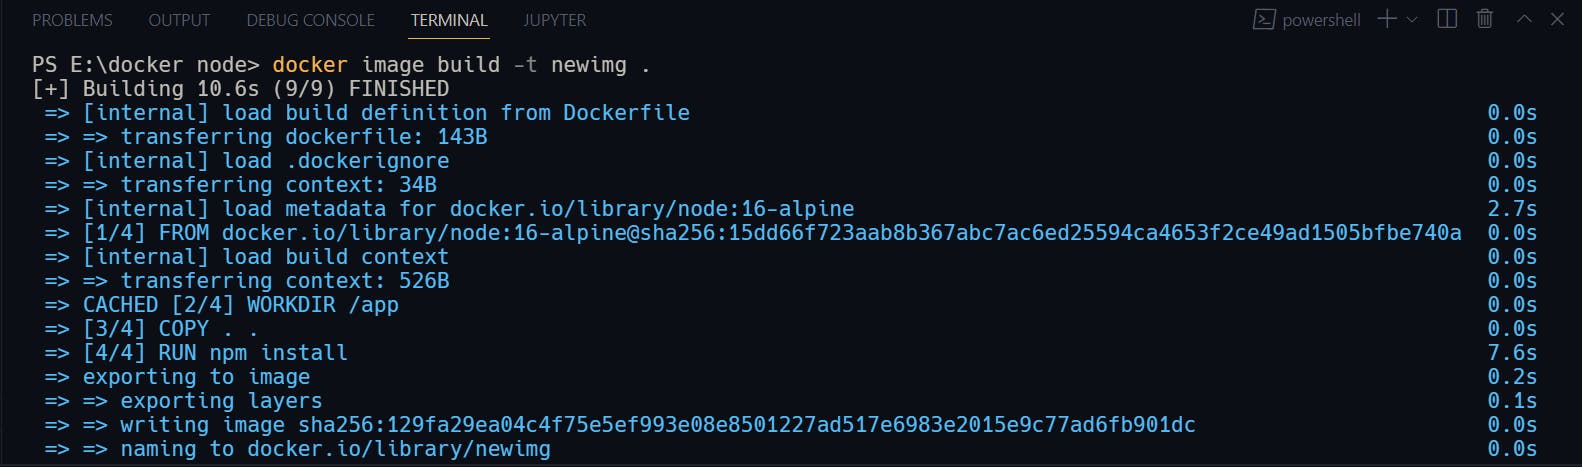
docker image build -t myimg .

// syntax:
// docker image build -<flag> <img name> <dir>
you should see following output:
- we can see the created images by opening the docker desktop.

- we can see them in the terminal as well.
Create Container
Finally, lets create a container by running the image
- In current directory run the following command
docker container run myimg
//syntax:
// docker container run <img name>
we should get the following output
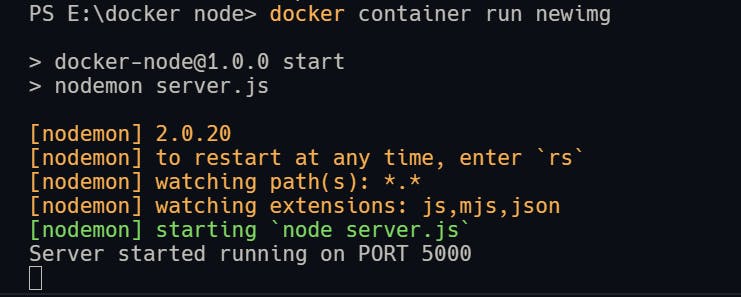
but wait! we still can't access our application in the browser on port 5000.
 To resolve this, we have to do port mapping as mentioned earlier
- Inside the terminal, in current directory run the following command
- "-d" runs the container in detatched mode
- "-p" is port flag
docker container run -d -p 5000:5000 --name container1 myimg

//syntax
//docker container run <flags> <local port>:<container port> <container name> <img name>
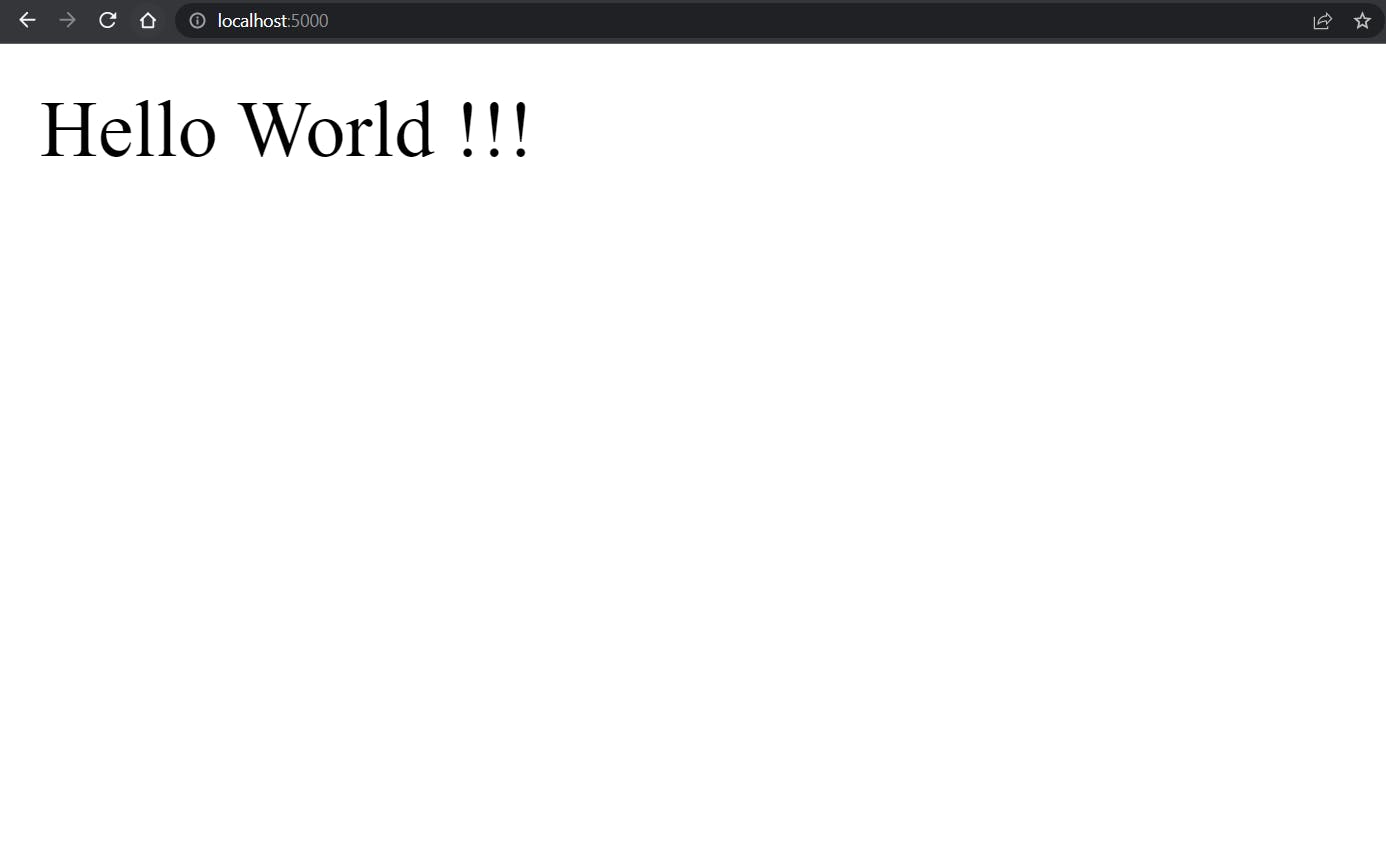
- After running this command we will be able to access our application in the browser by its port number
Access the running application
Wohoo! We have successfully created and dockerized a simple node application
What's Next?
Explore more about docker by going through official docker documentation
docs.docker.com